Creating a livery for a mapped vehicle
Paint, name, and pack a livery texture so it shows up in-game.
Syntax
Platform team
This guide covers designing a livery for a vehicle that already accepts liveries. You paint a texture, name it to match the vehicle's existing slot, drop it into the .ytd, and pick it in-game.
Pick a method
There are four common ways to add a livery to a vehicle that already supports them. Two run on Zoov, two are local desktop tools. Pick whichever fits the tools you already use.
| Method | Where it runs | Best for | Difficulty |
|---|---|---|---|
| Toolkit plugin (Photopea, Photoshop) | Browser or desktop | Designers already working in PSD, layered files, full editing control | Easy |
| The Browser Editor (zoov.dev/editor/design) | Browser | Editing a .ytd directly in the browser without installing anything | Easy |
| Codewalker | Desktop | Users already packing vehicles in Codewalker | Medium |
| OpenIV | Desktop | Users already on OpenIV with edit mode enabled | Medium |
Table of contents
- Method 1: Toolkit plugin in Photopea or Photoshop
- Method 2: The Browser Editor
- Method 3: Codewalker (edit mode)
- Method 4: OpenIV (edit mode)
- Naming your livery texture
- Load it in-game
- Troubleshooting
Method 1: Toolkit plugin in Photopea or Photoshop
The Toolkit plugin opens the vehicle's .ytd directly inside Photopea or Photoshop, lets you edit each texture as a layered file, and writes the .ytd back when you are done. If you have not installed the plugin yet, see Install the Zoov Photoshop plugin.
- Open Photopea or Photoshop and launch the Zoov Toolkit panel.
- Click Open .ytd and pick the vehicle's .ytd from its stream folder.
- The plugin lists every texture inside the .ytd. Select the livery slot you want to design. On a vanilla vehicle this is usually sign_1, on a custom vehicle it may be zoovdev_sign_1 (see Naming your livery texture).
- Paint the livery on the texture. Use the UV template as a guide layer so artwork lands on the right body panels.
- Click Save to .ytd. The plugin compresses your layers, replaces the texture inside the .ytd, and writes the file back to disk.
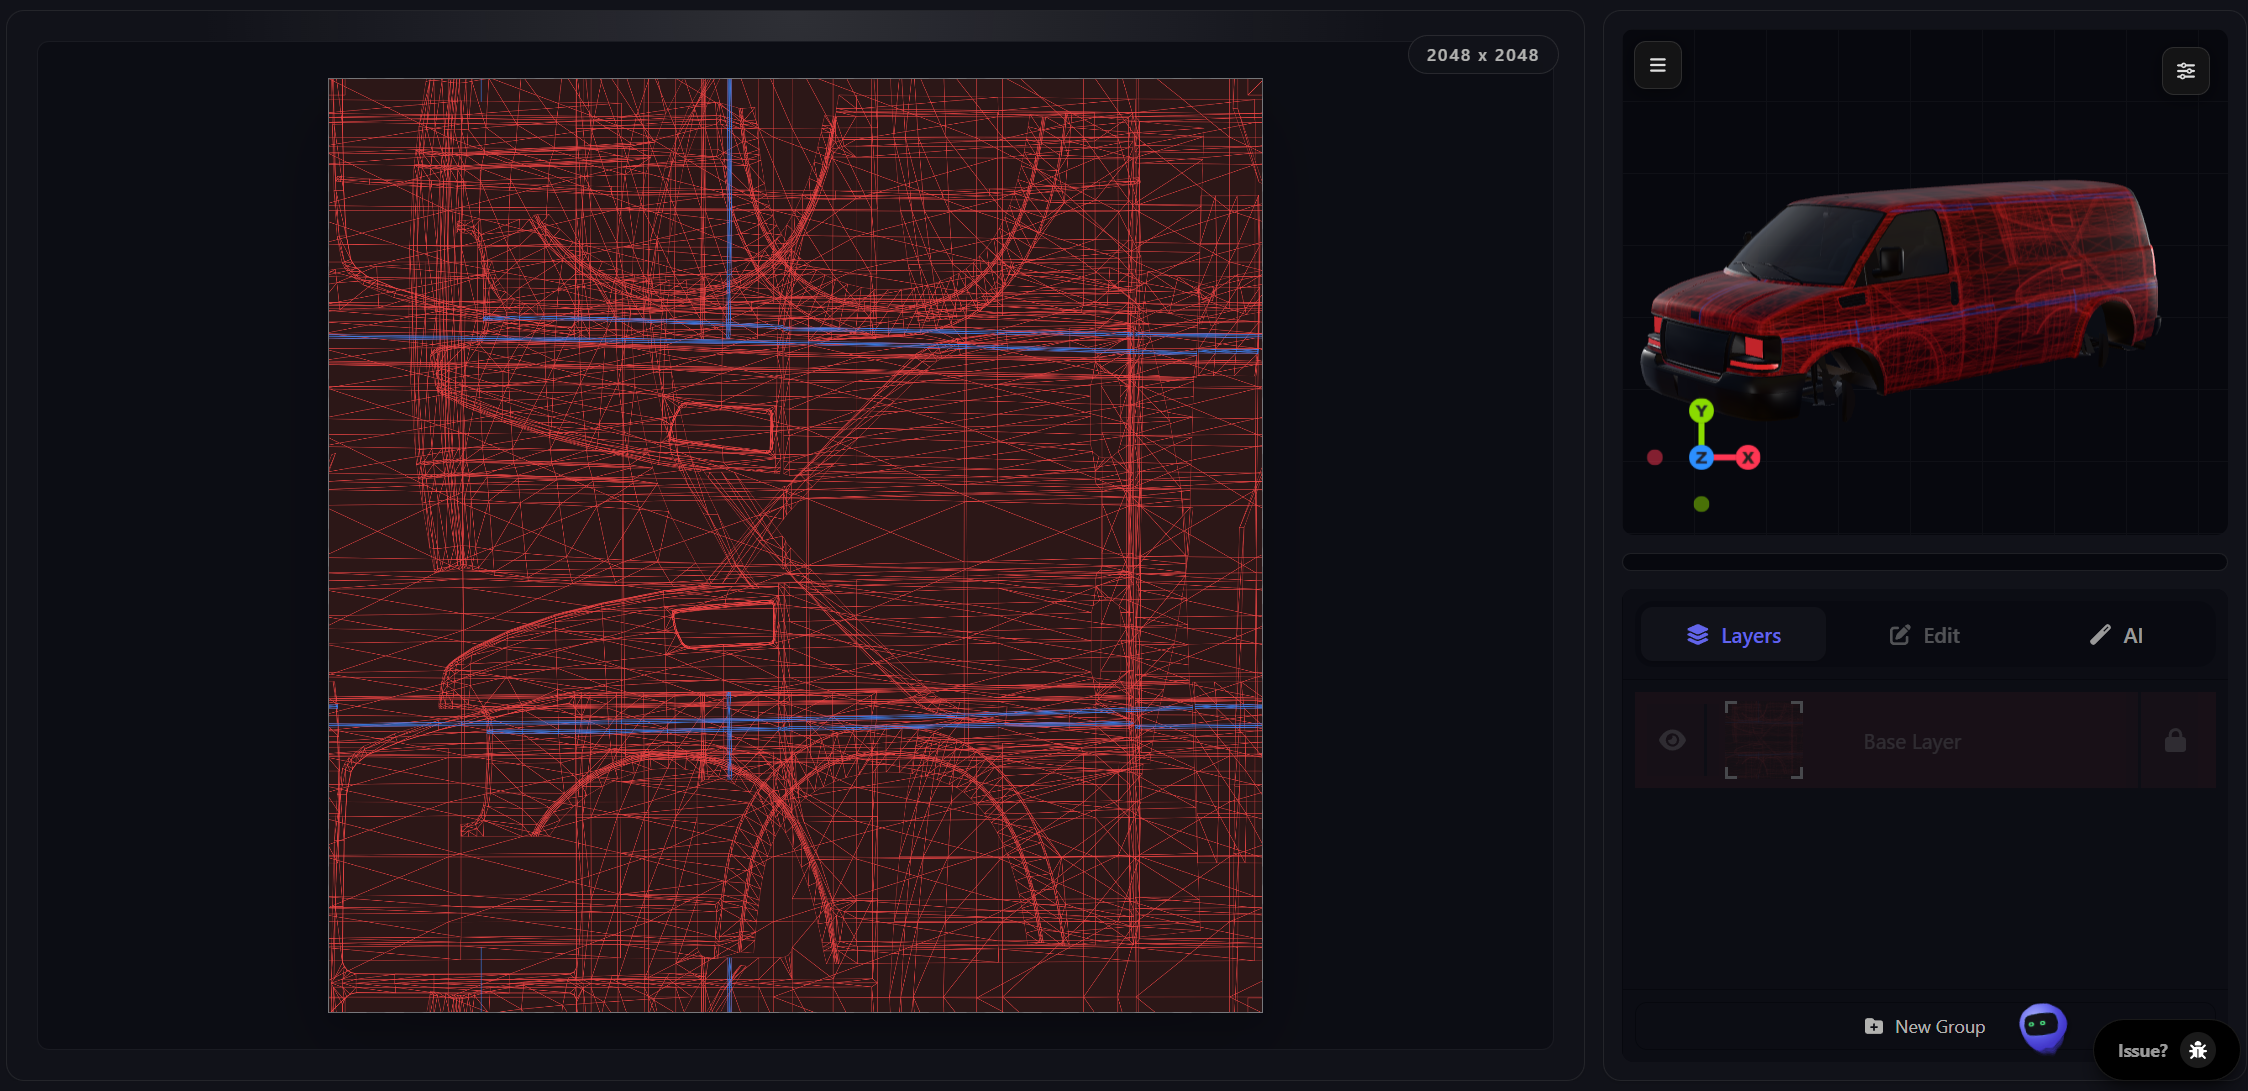
Method 2: The Browser Editor
The Browser Editor at zoov.dev/editor/design opens the vehicle's .ytd directly in the browser. Pick the texture you want to edit, replace it with your new image, and download the .ytd back out. No install, nothing to set up.
- Open /editor/design in the browser.
- Click Add File and pick the vehicle's .ytd from disk.
- In the top-right panel, select the texture you want to replace (same idea as picking a layer in Photoshop or Photopea). The livery slot is usually named something like vehiclename_sign1 or vehiclename_livery1 (see Naming your livery texture).
- Click Import and choose the new texture image. The editor swaps it into the .ytd in place.
- Repeat for any other textures you want to update in the same .ytd.
- When you are done, click Download in the top-right to export the updated .ytd.
Method 3: Codewalker (edit mode)
If you already use Codewalker, it can edit the .ytd directly. This section assumes you have Codewalker installed and edit mode enabled.
- In Codewalker RPF Explorer, browse to the vehicle's stream folder and open the .ytd.
- Right-click the texture you want to replace and choose Replace, or right-click the .ytd and choose Import to add a new one.
- Make sure the imported texture's name matches the slot the vehicle expects (see Naming your livery texture). Save the .ytd and save the RPF.
Method 4: OpenIV (edit mode)
OpenIV works the same way, with edit mode on. This section assumes you already have OpenIV set up.
- Browse to the vehicle's .ytd, right-click and choose Edit.
- Use Replace on an existing texture or Import to add a new one.
- Confirm the texture name matches the slot (see Naming your livery texture). Save and exit edit mode.
Naming your livery texture
The texture name has to match exactly what the model is asking for. The wrong name shows as the default paint, no warning, no error. Three common patterns:
| Vehicle source | Texture name pattern | Example |
|---|---|---|
| Custom vehicle, generic livery slot | sign_1, sign_2... | sign_1 |
| Vanilla GTA vehicle (police, taxi, etc.) | <vehiclename>_sign_1 or model-specific name | police_badging_01 |
| Vehicle mapped with the Zoov livery mapper | zoovdev_sign_1, zoovdev_sign_2... | zoovdev_sign_1 |
Numbering matters too. The order of textures in the .ytd needs to line up with the order of <liveries> entries in carvariations.meta. Texture _1 is the first slot, _2 the second, and so on.
Load it in-game
- Drop the updated .ytd into the vehicle resource's stream folder.
- Restart the resource (ensure <resource-name>) or restart the server if it is already running.
- Spawn the vehicle in-game.
- Open Los Santos Customs, the vehicle menu in your trainer, or whatever livery selector your server uses, and pick the new livery.
Troubleshooting
The livery slot is empty or shows the default paint
- Texture name is wrong. Reopen the .ytd and confirm the name matches what the model is requesting (see Naming your livery texture). Names are case-sensitive.
- Carvariations.meta is missing the slot. Each livery you ship needs an <Item value="true" /> inside <liveries> for the matching colour.
- Carvariations.meta is missing the flag. The variation needs <flags value="1" /> for the game to treat it as livery-capable.
- The vehicle has a _hi variant and you only updated the base .ytd. Update both, or confirm which one the game is loading at your camera distance.
The wrong texture appears on the body
- Texture order does not match <liveries> order. Slot 1 in the meta loads texture _1, slot 2 loads _2, and so on. Re-order the textures inside the .ytd if they are off.
- Two textures share a name. Only one will load. Rename one of them.
The texture shows but the artwork is mirrored or stretched
- The UV layout on the model does not match the layout you painted on. Use the UV template the mapper or vehicle author provides as a guide layer so artwork lands on the right islands.
- If you mapped the vehicle yourself with the Zoov livery mapper and the layout looks wrong, re-export from tools/create/livery with the islands flipped or rotated to match how the body wraps.
The vehicle does not accept any livery at all
- The vehicle is probably not mapped for liveries. Check whether the body uses the vehicle_paint3 shader and points at a livery texture name. If not, run it through Mapping a vehicle for liveries first.
- The .ytd or .yft is escrow-locked. Tools cannot edit a locked file. You need an unlocked source.
General tips
- Keep texture sizes power-of-two: 1024, 2048, or 4096. Anything else risks compression artefacts or refusal to load.
- Save a layered source file (PSD or Photopea native) alongside the exported PNG. You will want to come back and tweak.
- Restart the resource (ensure <resource-name>) after every .ytd change. The game caches textures and will not pick up a swap without a restart.
See also
- Mapping a vehicle for liveries - prepare an unmapped vehicle to accept liveries in the first place.
- Install the Zoov Photoshop plugin - set up the Toolkit plugin used in Method 1.